1- Log in to your cPanel account.
2- Under “Database” section, click “phpMyAdmin”.
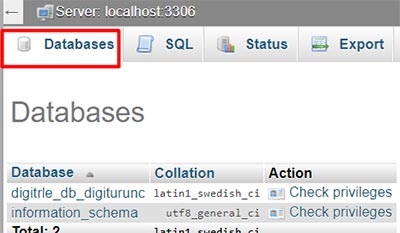
3- At the top of the page, click the “Databases” tab.
4- Inside the “Databases” tab, you can see the list of all your databases.


5- Select the database you wish to add tables to.
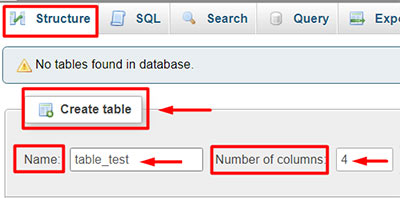
6- Inside the “Structure” tab, you can add tables to database.
7- Inside the “Name” field, enter the name of your table.
8- Inside the “Number of columns” filed, enter the number of column in your table. Although you can edit the number of columns later, and increase more.
9- Click “Go” button.


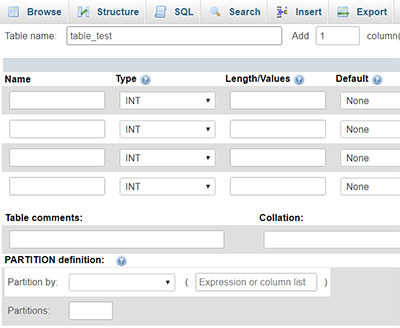
10- On the next page, you must define needed information for each column. Some of these fields are mandatory and some are optional.
- Name: Enter name of column.
- Type: Enter type of column including: INT, CHAR, VARCHAR, TEXT DATE, DATETIME, and some other types.
- Length/Value: Specify the maximum length or desired value for the column.
11- The remaining fields are optional.


12- Click “Save” button.
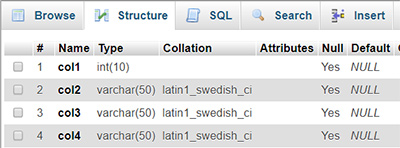
13- After clicking the “Save” button, you will be taken to a screen, where you can see the columns of the new created table.

